When printing on canvas you will often get asked “what type of wrap would you like?” and no, we aren’t asking you for your lunch order. The wrapping refers to what will show on the edges of your canvas and this article will provide you with all the necessary information and images to understand your options.
Firstly, lets quickly cover the concept of canvas stretching
When you have an artwork or print on canvas you’ll generally want to perform canvas stretching in order to prepare the item for hanging on your wall. The process of canvas stretching involves stretching your canvas over wooden stretcher bars that are usually between 1″ to 1.5″ in depth, and then stapling the canvas at the back onto these bars. This process tightens the surface of the canvas across the wooden bars, after which you can hang it up on the wall.
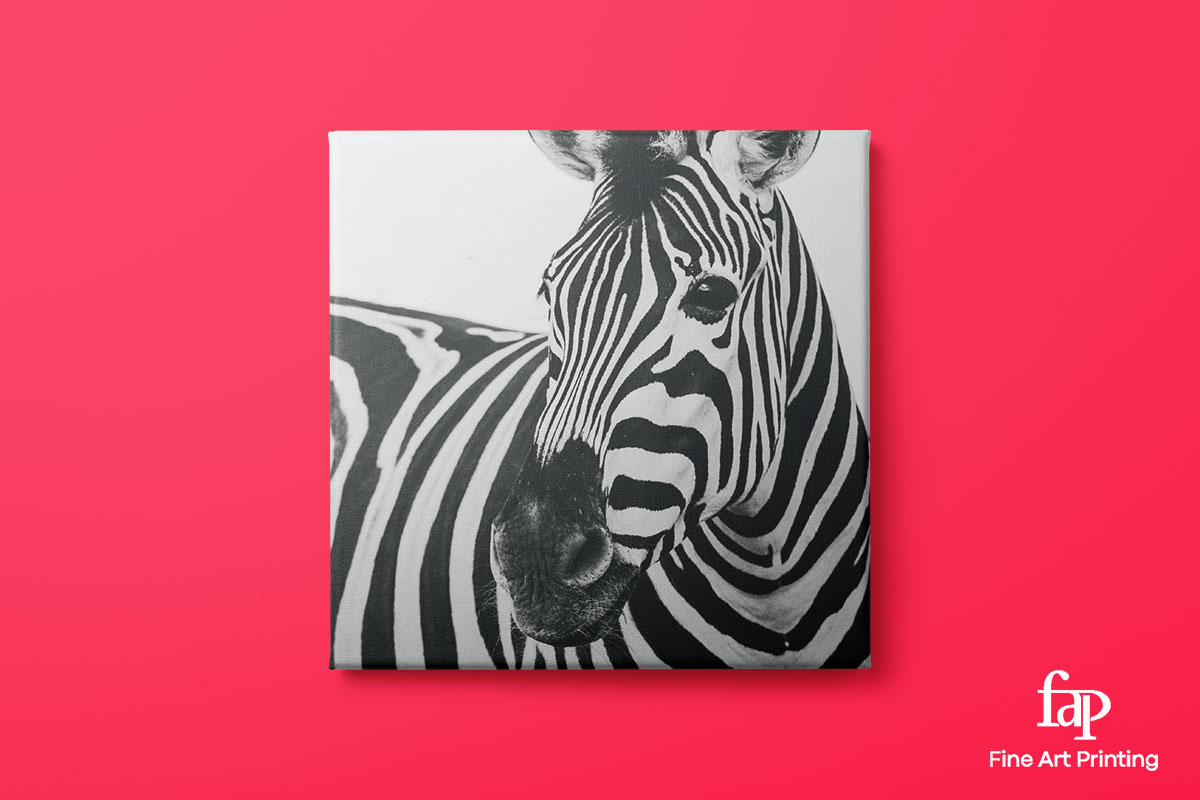
Here is an example of a stretched canvas from the front. The original photo was taken by Frida Lannerstorm
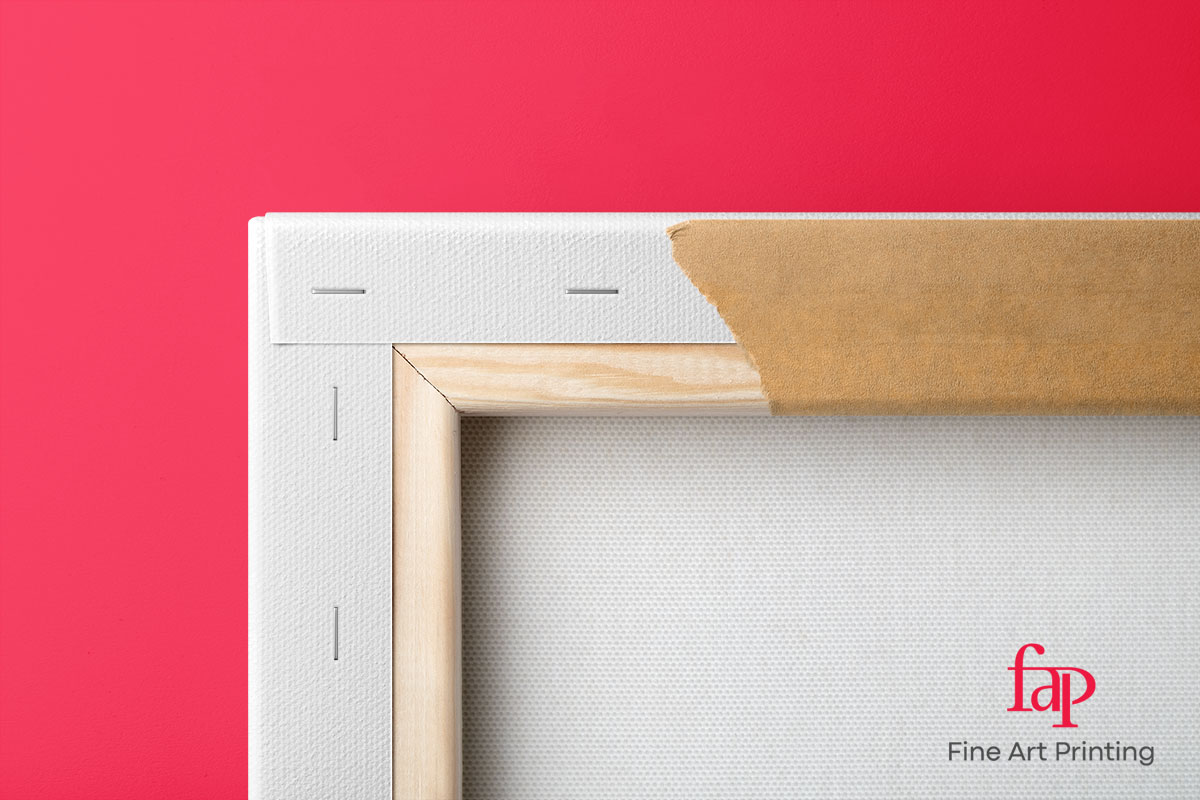
This is the rear of a stretched canvas where you can see that the excess canvas is stapled into the wooden stretcher bars. Not every vendor will do the same, but we tend to add an additional step of applying a good quality tape over the back to provide a more professional looking finish.
Why stretch my canvas rather than framing it?
Generally speaking the preferred method of hanging a canvas on the wall is to stretch it as opposed to more traditional framing. The primary reason for this [aside from maybe some personal preference] is that canvas stretching is considerably cheaper than framing and still looks great.
Lets use the example of a printed canvas sized at 50 x 50cm.
Canvas stretching will cost around $75 – $80.
Framing will cost anywhere from $130 – $250+ depending on your choice of frame style.
Another benefit to canvas stretching is that you can always “un-stretch” the canvas in the future, roll it up, and re-stretch it again at a later date. This can be done by simply removing the staples from the back of the canvas.
What are the different wrapping options?
When you print an image onto canvas you might get asked “what type of wrap do you want?” – this is basically referring to what you’d like to show on the edges of the canvas bars. There is basically 3 main options you can consider:
- Colour wrap
- Gallery wrap
- Mirror wrap
Lets review each of these options below so you can better appreciate the end result.
Colour wrap
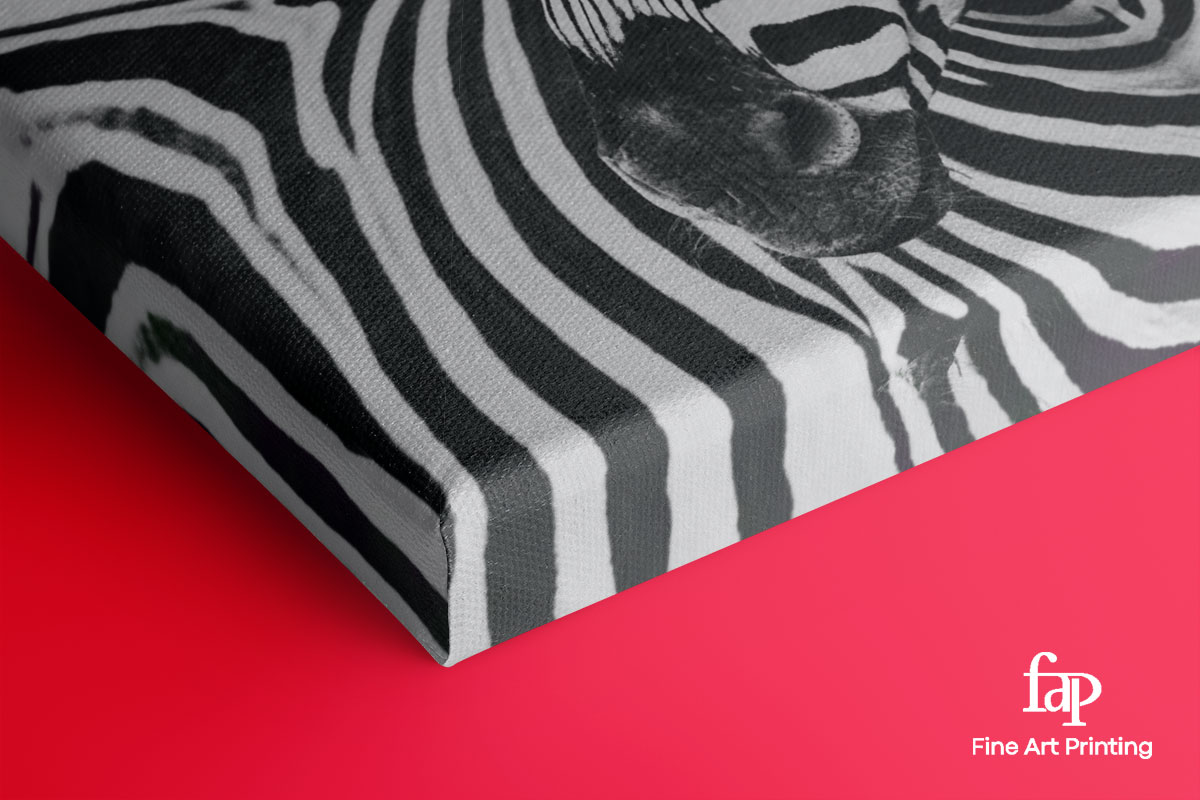
This type of wrap usually means that the edges of your canvas are left raw, i.e., just the natural colour of the unprinted canvas. When the canvas is stretched over the stretcher bars, the edges will retain this raw/natural colour on all 4 edges as per the image below.

If you are printing with us you can also request to customise the colour of the edges. For example, if your walls are a particular shade of say yellow, we could print the edges of your canvas in a similar tone, such as the mocked-up example below.
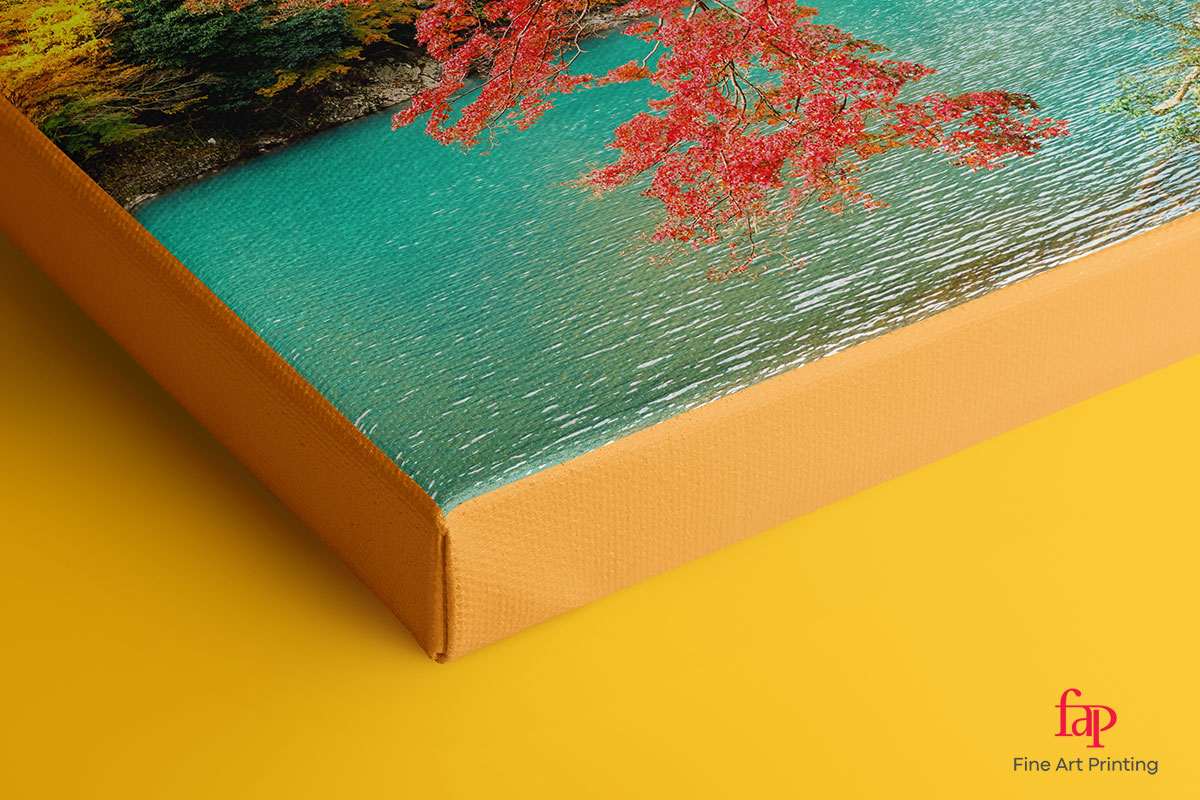
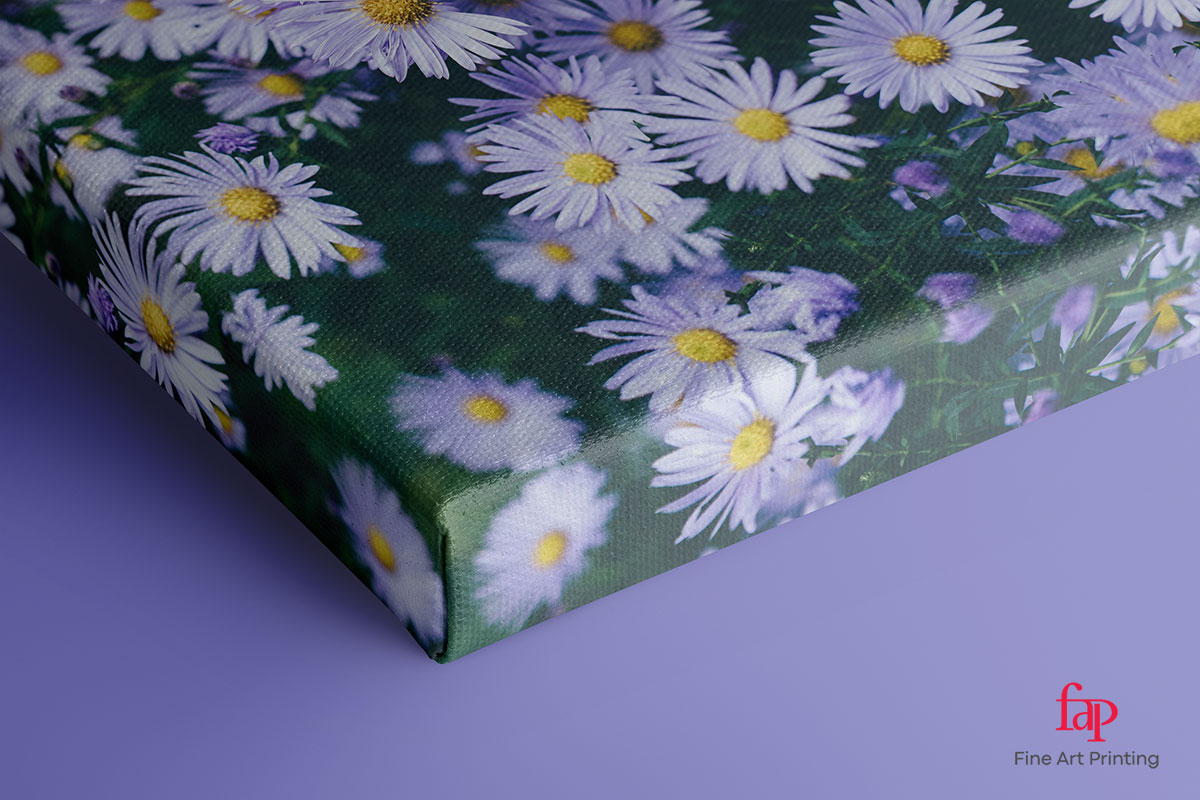
Gallery Wrap
The gallery wrap option involves wrapping some portion of your printed canvas over the edges of the stretcher bars. This can provide a really professional and colourful look to your completed canvas print. As you are losing some of the printed area of your canvas to the sides, this option works best when you have excess area around the edges of the photo that you don’t mind wrapping around the edges.
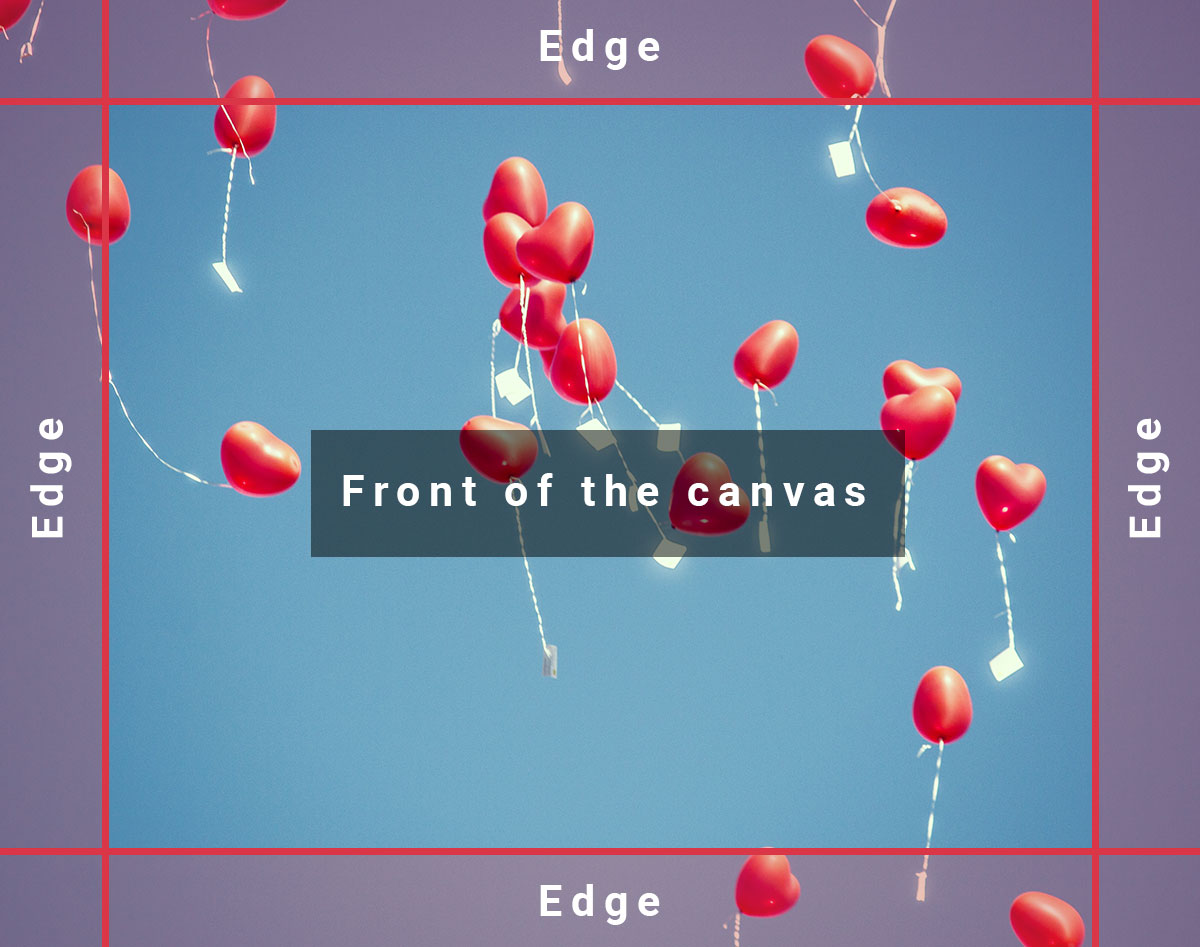
Below is an example where gallery wrap may not be the best option. There are many balloons close to the edge of the print area which will be cropped away from the front and wrapped onto the sides. In our opinion this would create a less than desirable outcome and other wrap types would work better for this particular photograph. We’d probably choose the colour wrap in this case, or possibly mirror wrap.
The original photo was taken by Michael Schaffler
Mirror Wrap
Mirror wrap looks very similar to gallery wrap in many respects, but rather than wrapping the edge of the image around the stretcher bars, the image gets mirrored to provide extra space for wrapping without taking anything away from what will be shown on the front. Below is an example of this mirror wrap for your reference. The original photo was taken by Annie Spratt
The one aspect to be cautious of with mirror wrap is if you have people or objects close to the edges of your image as sometimes the mirroring effect can produce weird results. In general its possible to further edit the edges of the image after mirroring to resolve these problems, so it can still be a viable option.
We have a standalone article available on how to create mirror wrap for your images in Photoshop if you’re interested in reading more. If you order canvas printing from us we’ll generally be happy to sort out the mirror wrap creation on your behalf as part of our service.
Which wrapping option should I choose?
It depends.
If you are not sure based on the article above and reference images then you are welcome to get in touch with us and we can advise you on the best options based on your print file.